Thursday, December 30, 2010
A rant about blog candy
Ok so I just started blogging in September and since have three times been the so called "winner" of blog candy from three different blogs. I say so called as I have never actually received the items I supposedly won. I am starting to wonder if the jokes on me. Is blog candy not real? Perhaps it's virtual. I also imagine there must be a margin of error in it, especially those blogs that have hundreds of followers and must get a lot of email. But not three times in a row from three different people. Regardless I find it extremely disappointing. Especially since I am not out there looking at blogs or commenting on peoples work just to get something for free. It's nice that they offer but really I am looking for inspiration and if I like your work I'll follow you and leave a comment whether you're offering something up to win or not. But to announce that someone won something cool and get them excited and then never actually send anything is mean in my book. Does it mean I'll stop playing along? No probably not, I am sure that there are some honest people out there and on the off chance that I do actually receive something down the line, what does it hurt? In the meantime though I just had to get this off my chest.:(
Wednesday, December 29, 2010
Thursday, December 23, 2010


Merry Christmas! Last of the Homemade Gifts


Thursday, December 16, 2010
CD folder


Tuesday, December 14, 2010
Snowman Soup packet take one

For my dog niece
Yes I have a sister who has a dog for a child. We all know someone like that are have been that person at some point in our lives. Since she buys gifts for all our children and get nuttin' from us I made this for her dog Miko.

 Her dog is a Husky so I tried to use the colors to match. I had the dog papers and paw print ribbon on hand. I cut the dog at 4" and I use the border feature on Paper Pups (came on my Gypsy) and cut a border that was 11.5 inches long. Since it doesn't allow you to use the shadow feature in combination with borders I cut another border slightly larger and edited out the yum part with my Gypsy. Of course it is filled with Milkbones. Hope she likes it (my sister and the dog:)


Teacher Gifts

Friday, December 10, 2010
Shrink Plastic Pins


Thursday, December 9, 2010
Crafting with the kids

Snowman Tees

Wednesday, December 8, 2010
Birthday Card

Tuesday, December 7, 2010
Blog candy

Sunday, December 5, 2010
Cards for Donation to Childrens Hospital
Chris Wooten of the Turned Gypsy Blog is collecting cards to donate to a childrens hospital. I sent her two dozen! If you have cards of any type to brighten a childs day please send them to her.
Wednesday, December 1, 2010
Santa Card
I got my free sample of Action Wobbles just before Thanksgiving and have had this card in mind ever since. I just love the way the Santa shakes when he laughs his big Hohoho! I used the Christmas solutions cartridge for Santa and Plantin Schoolbook for the Hohoho. I used my Gypsy to weld the letters all together. The paper and ribbon is from last year's Stampin Up stash.


Tuesday, November 30, 2010
Advent calendar
My mom and I created this advent calendar a few years ago. I might not have even had kids at the time, I can't recall, It's all a blur. Anyhow I found it difficult to find trinkets small enough to fit in these favor tins and I had several incidents of the lids falling off and dumping out candy when I filled them with things like M&Ms. Last year I saw a great idea in Disney Family Fun magazine for an advent calendar filled with fun things to do as a family everyday leading up to Christmas. I just finished printing up my list of things and I am cutting them and putting the little slips of paper in the tins. Some are simple things like read Twas the Night before Christmas, watch the Polar Express and make a paper plate Santa. Others are take the train to see Santa at the Danbury Rail Museum and go to the Holiday Spirit Festival at Bowdoin Park. I am looking forward to sharing the calendar with the boys tomorrow and I am glad I don't have to worry about spilling mishaps with the calendar this year.


Thanksgiving Table Favors
I know Thanksgiving has come and gone. But I did make favors for the table and take photos. I loved the Gratitude Stamp Set in the Stampin Up Holiday mini this year and the paper that went with it. It was just beautiful. We made these at the Stamping in the Woods retreat I went on this fall with my upline and stamping friends. I covered Hershey's nuggets with the paper and put them in treat bags. The bags had to be folded and taped in the back so the chocolates fit snugly. My sons were so excited to eat their chocolates that all they did during dinner was ask if they could open them!


Stuff to add
I do have photos of things I have been working on to add. I just haven't gotten to it yet but I will. I have been enjoying all the project on the blogs I follow and not spending enough time crafting my own project. Stay tuned for an update.
Tuesday, November 16, 2010
Fall frame

I love this frame. It's the first project I completed with my new gypsy and I can't believe how easy it was to make all these cuts. I started with a white mat from Michael's and stamped SU Pumpkin Pie Ink all over it. It didn't cover evenly but I really like the way it gave it texture. It almost looks suede to me. Then I used TH walnut stain distress ink all over the mat. I cut the apples, basket, leaves, and acorns from Doodlecharms. The pumpkins and wheelbarrow are from Everyday Paper Dolls. The tree is from Stretch Your Imagination and the font is All Mixed Up. The apples got a coat of glossy accents to make them shine and some brads made the basket. Everything is shaded with distress inks. I'd like to come up with a few more designs to give these frames as gifts (but we'll see how much I actually complete before Christmas). Oh yeah a side note I bought a cheap-o frame from WalMart and when I tried to stuff this into the frame the glass cracked in three places! So I either need to find some frames with a little more dimension or not use dimensionals on my die cuts.
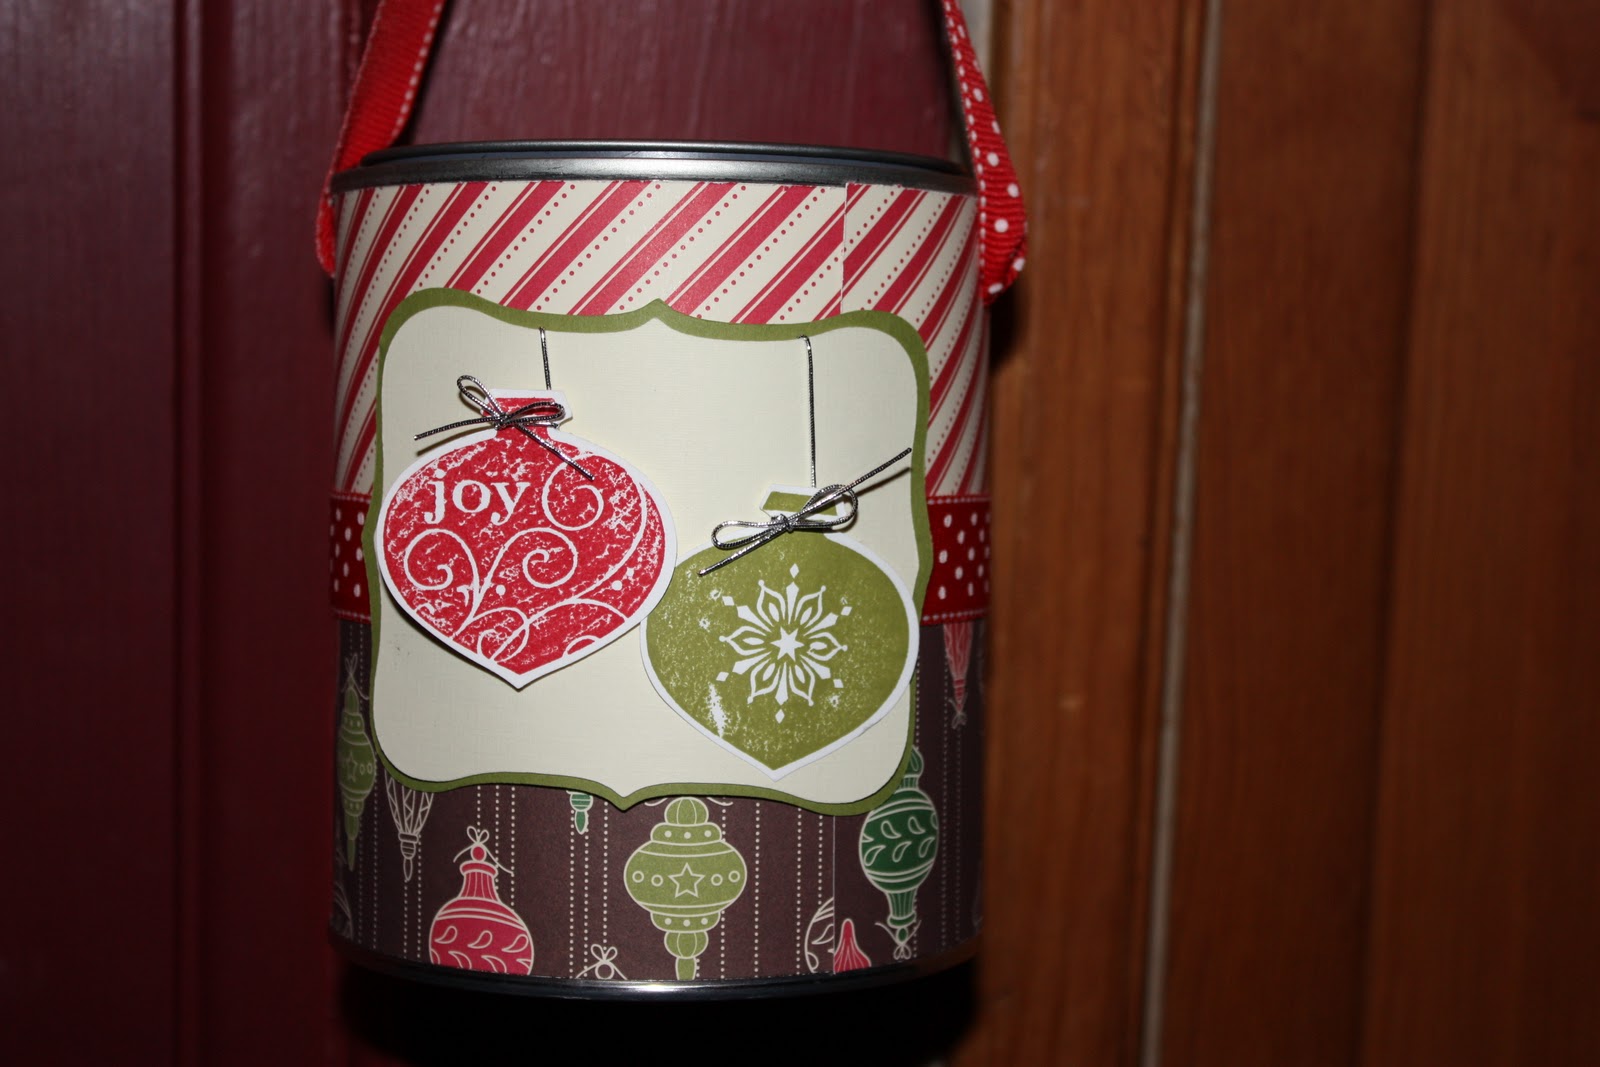
Saturday, November 13, 2010
Altered Paint Can
Sunday, October 31, 2010
Tissue Box


I made this tissue box cover from the tutorial on Split Coast Stampers. The paper is stampin up autumn vine and the gobble and turkey are from the create a critter cartridge.
Tuesday, October 19, 2010
Finally!
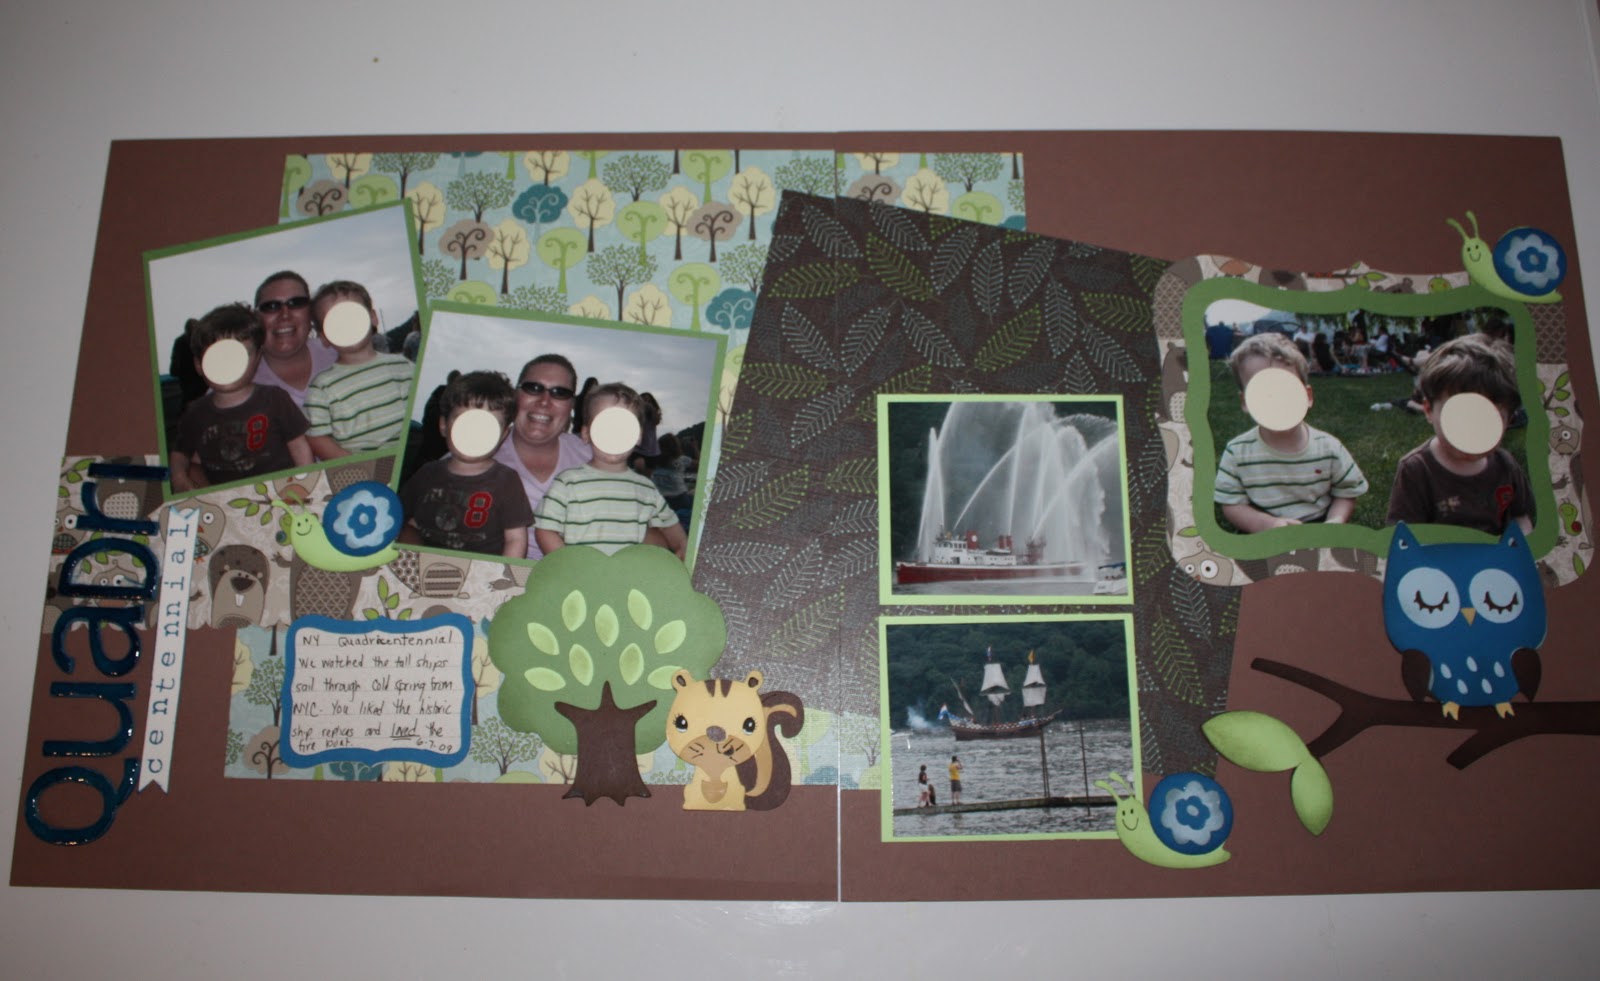


Sunday, October 10, 2010
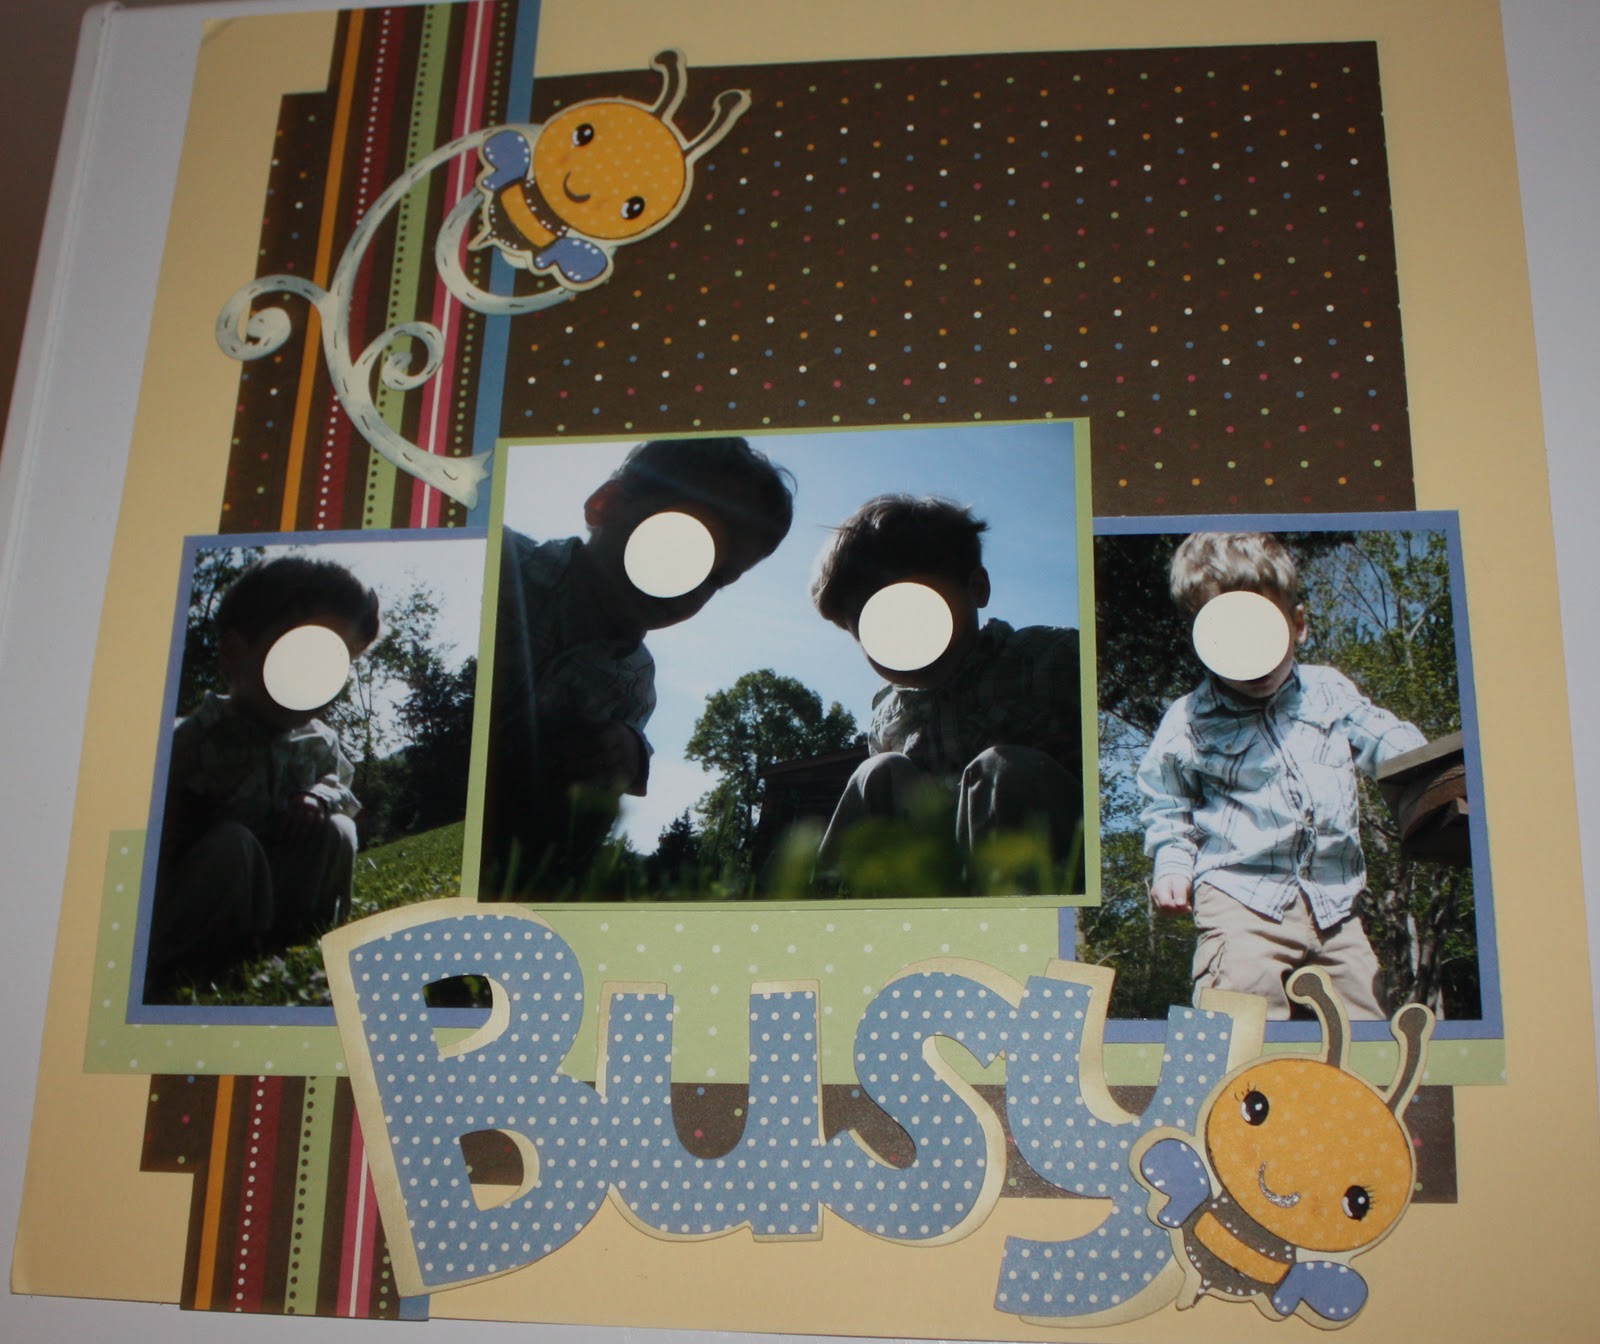
Busy Bees
I was a busy bee yesterday. I went to a crop in Hyde Park with the. Central-Perk-Scrappers. I met two fun ladies Karen and Jessica and got some good scrapping time in. I really put the Create A Critter cartridge to work too. I basically completed two layouts although I didn't finish the journaling on one of them so I'll post it when it's finished. I got a good head start on a third ( I picked out a format and the paper two things that take up a lot of my time). I'll go ahead and post the one layout that is truly done now as I really liked it and want to share. I hope you like it too.


Tuesday, October 5, 2010
New Layout
I really struggled with this layout. I wanted to scrap these photos but the colors were so drab. Then I found these papers from KaiserCraft and the camo ribbon in my Mom's store Paper Crafters Unlimited. They worked with the boots that have a camo print in them. Still I couldn't figure out what to do with them. I think part of the problem was I had too many photos and couldn't really crop them down much. I used Accent Essentials to cut the scalloped circle and Graphically Speaking for the title. Here's the finished product. I was thinking it was kind of a boring layout until I used distress inks around the border of the whole thing. It made a huge difference. And to think I resisted these inks for so long.


Silverware Pockets
So yesterday was a productive day in crafting. I did some long overdue scrap organizing and then set in to work on a project I had in mind for awhile. I saw these adorable fabric "silverware pockets" at Hobby Lobby and thought Hmm maybe I can make something like that. The following are my versions. They are all made with a pocket card fold.

He is by far my favorite. It's the turkey from the Create a Critter Cartridge. The DS paper is SU Autumn Vine and I also used More Mustard, Chocolate Chip, Close to Cocoa , and Really Rust. Isn't he stinkin' cute.


This one I used a stamp from SU Thoroughly Thankful. I love the way it looks when watercolored. This was my first time using watercolor pencils with a blender pen and I really like the way the colors turned out.
Wednesday, September 29, 2010
Halloween S-Fold card


Saturday, September 25, 2010
My Christmas Card finalized


Just Beachy

Fun with Paint

Cape Cod Railway

Boo Banner

Bath Time

Sunday, September 19, 2010

Subscribe to:
Posts (Atom)